 1-800-413-2579
Dealing with Columns, Capitals and Bases on a Porch Screening Project
How to tackle everything from the basic 2x4 to the grandiose and ornate
Porch columns do more than support your roof—they play a big role in your home’s style and curb appeal. While standard 4” x 4” or 6” x 6” posts make screening projects fairly straightforward, many porches feature more decorative elements like column capitals, base trim, or finishes such as PVC wraps, stone, stucco, or brick. These added details can create unique challenges when installing a screen system. With the right approach and a few key tips, you can successfully install your SNAPP® Screen Track system around even the most detailed column designs.
Standard Column Types
This category covers typical post-and-beam construction, including 2x4, 4x4, and 6x6 columns.
Fully Exposed Columns
These are the most straightforward to work with and require no special prep. Simply mount the SNAPP® Screen Track directly to the column. Both PVC and powder-coated aluminum track can be installed onto pressure-treated lumber. For aluminum track, it’s best to add a bond breaker—running a strip of standard electrical tape along the back of the track will help prevent direct contact between the aluminum and treated wood.
Columns Wrapped with Wood or PVC Trim
If your columns are wrapped with trim boards, you can treat them the same as fully exposed columns. Installation remains simple and direct.
Columns with PVC Sleeve Covers
These require a bit more attention depending on how the sleeve fits over the internal post. Start by pressing on the center of the sleeve to check for movement:
- Little to No Movement:
Install as you would a standard column, but position the SNAPP® Screen Track at least ½" back from the outer face of the column. - Noticeable Flex or Deflection:
This indicates a gap between the sleeve and the internal post. Mount the track at least ½" from the outer face, and be careful during installation—tighten screws only until you begin to see slight inward movement of the sleeve. You’ll likely need longer screws (typically around 1-1/2") instead of the standard hardware.
Note: Overtightening can crack or distort the sleeve, so take care.
Overall, standard column setups are very compatible with SNAPP® systems and typically require only minor adjustments for a clean, secure installation.
Capitals and Bases
“Capitals” (the decorative tops of columns) and “bases” (the decorative bottoms) can range from simple box styles to highly detailed architectural features. Some porches have none, some have one or the other, and others include both. No matter the design, the objective stays the same: create a flat, consistent surface for mounting the SNAPP® Screen Track and achieving a clean, seamless finish.
There are two primary ways to accomplish this:
1) Splitting the Capital or Base
In this approach, the capital and/or base is carefully cut and temporarily removed. After installing the SNAPP® Screen Track and screen, the trim is reinstalled and trimmed as needed to fit neatly around the track.
- Works well for both simple and ornate trim designs
- Can sometimes be done with partial removal depending on the profile
- Allows the screen system to integrate cleanly without bulky add-ons
- May include additional elements like starter strips or vertical spacers for alignment
Examples below:
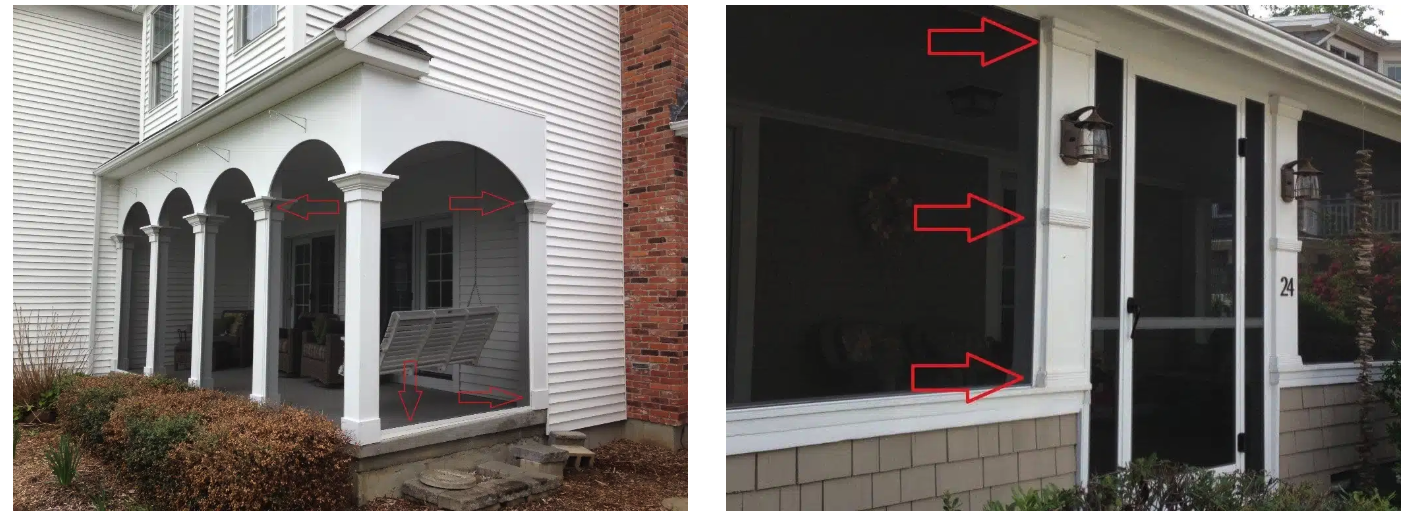
- Left photo has a split capital, split base, and a base edge starter strip*.
- Right photo has split capital, split base, split center trim and a vertical starter strip*.
2) Creating “Negatives”
“Negatives” are custom filler pieces—typically made from 1" or 5/4" wood or PVC—that bridge the gap between the outer edge of the capital/base and the column face.
- Built to create a flat mounting plane for the track
- Ideal when removing trim isn’t practical or desired
- Can be customized to match the design and proportions of the column
- In more complex designs, smaller fillers (like returns or toe kicks) can be used to avoid oversized pieces
In some cases, negatives may sit on top of the base or be notched around trim details to maintain a clean, finished look while still providing a solid installation surface.
Examples below:
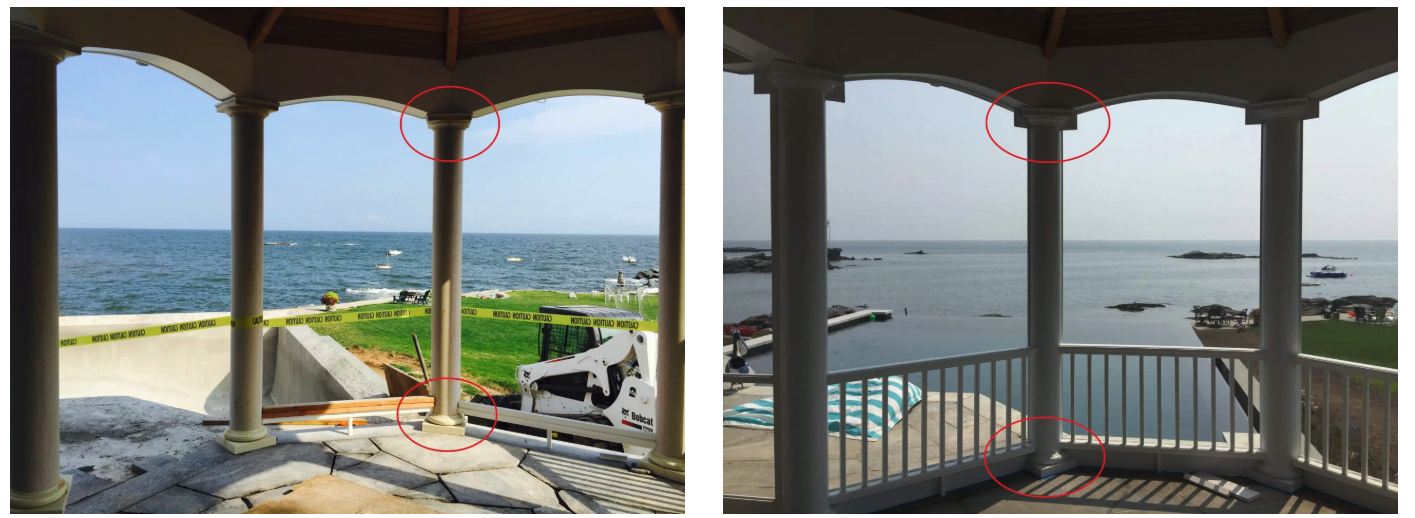
- Capitals and bases are noted on each photo on the left.
- "Negatives" are noted on the right side photos.
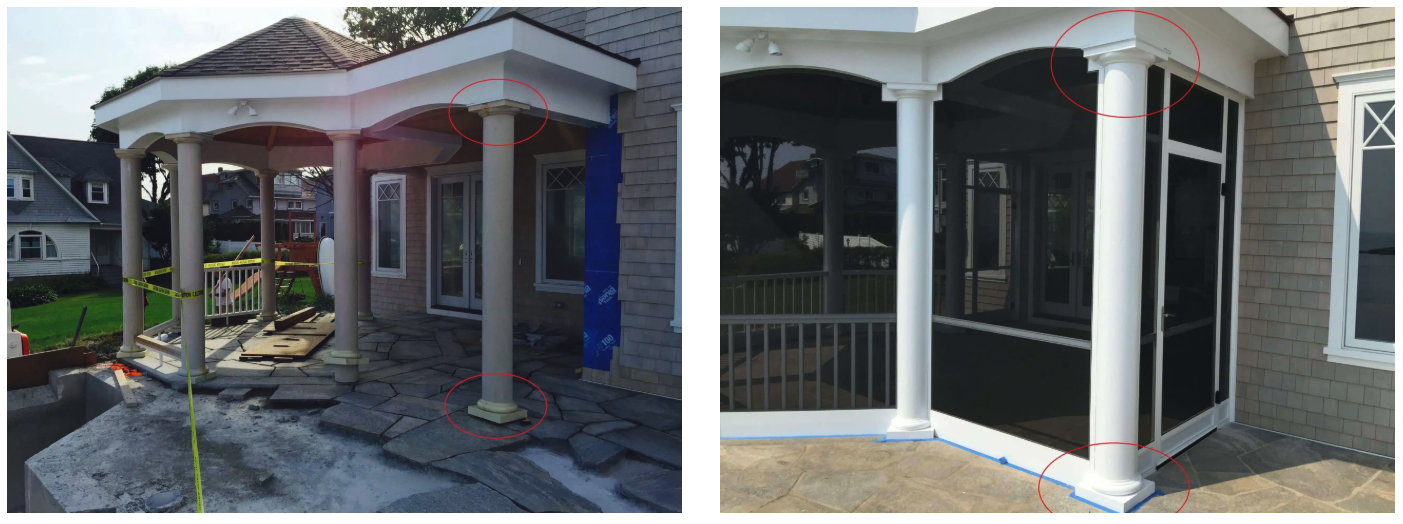
Exterior "before" and "after" photos shown below
What is a Starter Strip?
A starter strip (or spacer) is a piece of wood or PVC used to create extra clearance between the SNAPP® Screen Track and surrounding surfaces like floors, columns, or walls.
- Commonly used on concrete, stone, or brick
- Provides additional working room for installation
- Allows you to use standard (clean-looking) fasteners on the track
- Conceals masonry hardware underneath for a more polished finish
Victorian, Gingerbread & Ornate Porch Styles
Victorian and “gingerbread” style porches are some of the most intricate—and challenging—structures to screen. These porches are typically located at the front of the home and often feature highly detailed woodwork, decorative trim, and architectural accents. In some cases, they may even fall under historic preservation guidelines, so it’s always important to check local regulations before starting any modifications.
Because of their visual prominence and detail, the goal is to preserve the original exterior appearance as much as possible. For that reason, screening from the outside is strongly discouraged. Exterior-mounted screens can obscure ornate features and diminish the overall curb appeal. Instead, the preferred method is to install the screening system from the interior, keeping the outside view clean and unchanged.

Interior Framing Approach
To make this work, you’ll need to construct a secondary framing system inside the porch:
- Build a full frame from floor to ceiling and wall to wall
- Use 2x3 or 2x4 pressure-treated lumber or a structural composite
- Frame out an opening for a door—ideally centered with the main stairway
- Align vertical breaks with existing columns to keep everything visually hidden
The key objective is to ensure the framing blends seamlessly into the porch so that, aside from the door and any sidelights, the structure is virtually invisible from the outside. Once the framing is complete and painted to match the space, you can proceed with installation just like a standard screen porch project using the SNAPP® system.
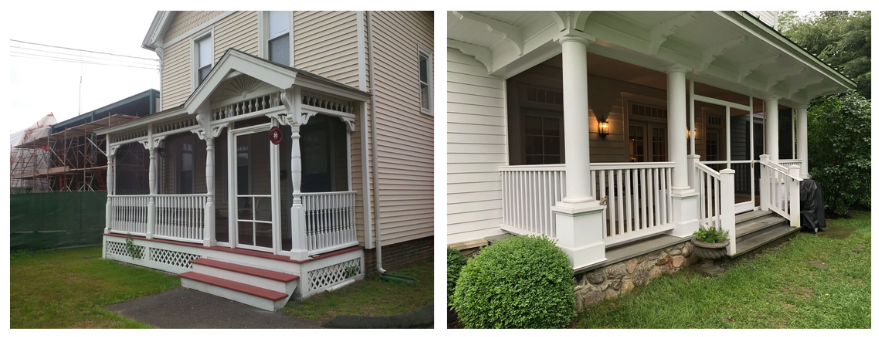
Final Result: Preserved Beauty, Modern Function
With this approach, even the most ornate porches can be screened without compromising their original charm. Whether using traditional wood doors or aluminum options, a properly installed interior system ensures that:
- The home’s architectural character remains intact
- Decorative details stay fully visible from the outside
- The porch gains all the benefits of screening—without visual trade-offs
Done right, the result is a functional, screened-in space that looks as if nothing has changed from the street—except everything feels more comfortable inside.
Brick, Stone, Concrete & Stucco
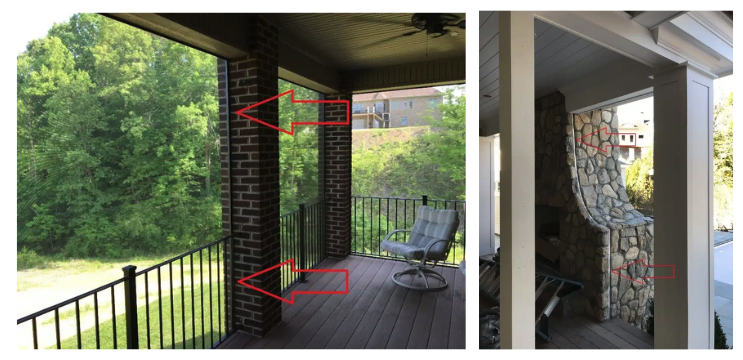
Installing a screen system on masonry surfaces—like brick, stone, concrete, or stucco—can be more involved, but it’s absolutely achievable with the right prep. Whenever possible, the best results come from planning ahead during construction so a proper mounting surface is built in from the start.
Pre-Construction Planning
If you’re building a new porch or remodeling, incorporate a flat, secure mounting surface anywhere the SNAPP® Screen Track will be installed.
- For brick or stone features (like fireplaces or columns), this may mean leaving a smooth edge or adding a built-in mounting strip
- Track can be mounted directly, or paired with a spacer if needed for alignment
- For modern stucco systems (stucco over foam and wood), ensure there is solid wood backing behind all installation points
A little foresight here can eliminate the need for modifications later.
Working with Existing Surfaces
If you’re installing on an existing structure, your approach will depend on the surface:
- Smooth Surfaces (brick, stone, or concrete):
You can mount the SNAPP® Screen Track directly. That said, using a starter strip (spacer) is often preferred for easier installation and a cleaner finish—but it’s optional. - Uneven or Textured Surfaces:
A starter strip becomes essential. Secure it firmly to the surface, then fill any gaps behind it using solid roll foam (backer rod). Tuck it in tightly with a screwdriver or putty knife.
Avoid using spray foam or caulk, as they can create long-term issues.
Stucco Considerations
- Traditional Stucco (over concrete):
Track can often be mounted directly, or you can install a starter strip first for added flexibility. - Modern Stucco Systems (over foam and wood):
Use extra care. Fasteners must be long enough to reach the wood framing beneath the foam layer. Tighten screws just until secure—over-tightening can crack or damage the stucco finish.
Starting Points
One of the most common questions when installing SNAPP® Screen Track is how to handle the starting point—where the screen system meets the main structure of your home.
When a Built-In Mounting Surface Exists
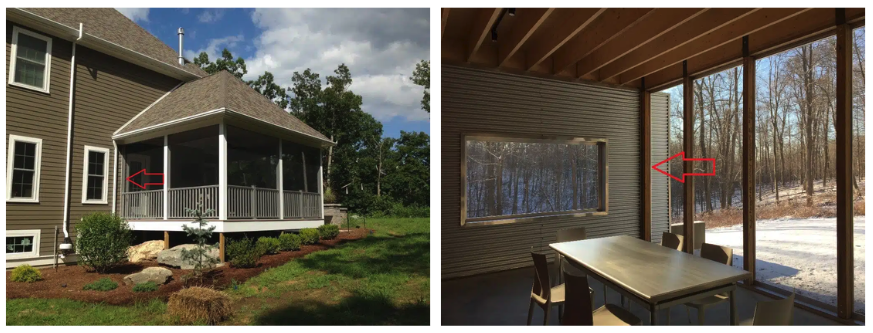
If screening was considered during the original design or build, there’s often already a column or flat surface positioned against the home’s exterior. In these cases, installation is simple:
- Mount the SNAPP® Screen Track directly to the surface
- No additional modifications are typically needed
- If there’s a small gap between the column and siding, you can fill it with soft foam (backer rod) for a cleaner seal
- Avoid spray foam or adhesive-backed materials
Some porches naturally include a column against the home due to their layout—these can be treated the same way. The images below show examples of starting points that already exist.
When You Need to Create a Starting Point
If there’s no natural mounting surface, you’ll need to create one. This is where most installations require a bit of customization:
- Starter Strip (Spacer):
A wood or PVC strip is installed against the home to create a flat mounting surface.- Works well with siding like clapboard, metal, or vinyl
- Can be installed as-is, with optional foam behind it for a tighter fit
- Once in place, the SNAPP® Screen Track mounts directly to it
- Full “Negative” Build-Out:
For more complex surfaces (like brick or uneven walls), a larger filler piece—called a negative—is created to bridge gaps and establish a consistent plane.- May include custom shapes (like sawtooth designs) to match siding profiles
- Provides a seamless, professional mounting surface
- Allows for direct track installation once completed
No matter the scenario, the goal is always the same: create a flat, secure surface so the SNAPP® Screen Track can be mounted cleanly and function properly. With the right starting point in place, the rest of the installation becomes straightforward.